

Table of Contents
- What Separates a Great Surfboard Display Rack From a Cheap One
- Quick Comparison: Wall Mount Surfboard Display Racks
- Best Surfboard Racks for Small Garages and Tight Spaces
- Horizontal vs Vertical Surfboard Wall Mounts: Which Fits Your Space?
- How to Install Surfboard Wall Racks Without Damaging Your Walls or Board
- Damage Prevention and Board Care: What Cheap Racks Get Wrong
- Safety and Load-Bearing: What Your Wall Can Actually Hold
- Conclusion
- Frequently Asked Questions
Last Updated: September 28, 2026
What Separates a Great Surfboard Display Rack From a Cheap One
A great surfboard display rack protects your board's rail and deck while holding it securely; a cheap one quietly damages the thing you paid for. The difference comes down to three things: how the rack contacts your board, how it mounts to the wall, and how easily you retrieve a board without knocking into the others.
Quick Comparison: Wall Mount Surfboard Display Racks
The best wall mount surfboard display racks fall into four basic types.
| Rack Type | Space Needed | Best For | Board Protection | Installation |
|---|---|---|---|---|
| Horizontal wall mount | Wide, low wall area | Longboards, wide boards | Moderate | Stud or anchor mount |
| Vertical wall mount | Narrow, tall wall area | Shortboards, tight spaces | Moderate to high | Stud or anchor mount |
| Expandable cradle system | Narrow 12-inch profile | Growing quivers, custom boards | High (foam and neoprene) | Under 10 minutes, no power tools |
| Freestanding floor rack | Floor footprint | Renters, no-drill setups | Moderate | None |
Best Surfboard Racks for Small Garages and Tight Spaces
For small garages and tight spaces, vertical wall mounts and expandable cradle systems win because they use the wall instead of the floor, keeping a narrow profile and letting you add boards as your quiver grows.
Here's what to look for in a space-constrained setup:
- Vertical orientation: Uses wall height instead of floor area, ideal for shortboards and hybrid boards
- Narrow profile: A slim footprint, around 12 inches, keeps walkways clear
- Expandability: Add boards to the same system instead of mounting a second rack
- Ceiling or closet mounting: Some systems mount to ceilings or closet interiors when wall space is gone
- Easy retrieval: Boards that rotate or slide out prevent the domino effect when you pull one down
Horizontal vs Vertical Surfboard Wall Mounts: Which Fits Your Space?
Horizontal surfboard wall mounts suit longboards and wide boards that need full-length support, while vertical mounts suit shortboards and narrow walls.
- Choose horizontal if: you own longboards, funboards, or wide SUPs that are awkward to stand vertically, and you have a long stretch of wall. A horizontal rack spreads the load across two or more contact points.
- Choose vertical if: you own mostly shortboards, you're short on wall width, or you want to line up several boards side by side. A vertical rack holds the board on its rail, keeping the deck and tail free.
- Mix both if: your quiver spans board types, since one wall can hold a horizontal longboard rack above a row of vertical shortboard mounts.
How Board Type Changes the Math
The orientation question sharpens by board class:
- Shortboards (typically 5'6" to 6'6", roughly 5 to 8 pounds dry): Vertical works well. A shortboard is light enough for a single padded cradle and uses about 6 to 8 inches of wall width per board.
- Funboards and mid-lengths (7' to 8'): Either works, but horizontal usually wins because the extra length makes vertical loading awkward under a standard 8-foot ceiling.
- Longboards (9' and up, often 12 to 20 pounds dry): Horizontal is the safer default. A 9-foot board standing vertically needs roughly 9 feet of clearance plus room to lift it off the mount, which most garages and apartments lack.
- SUPs (10' to 12', commonly 25 to 35 pounds dry): Horizontal, almost always. SUPs are wide and heavy, and standing one vertically concentrates stress on the rail in a narrow cradle.
Mostly SUPs and longboards? Plan for horizontal. Shortboards and hybrids? Vertical frees up the most space.
The Rail-Stress Trade-Off Nobody Mentions
Vertical storage loads the board's rail, the thin edge where deck and bottom meet. That is fine when the cradle is wide and padded, since the load spreads across a few inches of foam.
A Quick Way to Decide
Count your boards by class. If more than half are 8 feet or longer, or any board weighs over 20 pounds dry, go horizontal. If most are shortboards and hybrids under 7 feet, go vertical. If you have both, split the wall: horizontal longboard rack up high, vertical shortboard row below.
How to Install Surfboard Wall Racks Without Damaging Your Walls or Board
Installing surfboard wall racks safely means hitting studs or using rated anchors, leveling the mounts, and padding every contact point. Most kits install in under 10 minutes without power tools, but the wall behind the rack decides whether it holds.
- Find your studs. Use a stud finder and mark the center of each stud, the strongest option, avoiding drywall anchors entirely.
- Choose your hardware. Into studs, use the kit's lag screws or heavy-duty fasteners. Into drywall only, use rated anchors matched to the load.
- Mark and level. Hold the rack against the wall, mark the holes, and check level before drilling; an unlevel rack puts uneven pressure on the board.
- Mount the rack. Drive the fasteners until the rack sits flush and firm.
- Add padding at contact points. Foam or neoprene where the board rests prevents rail pressure and scuffs.
- Test with an empty hand first. Press down where the board will sit to confirm the rack doesn't flex or shift.
Damage Prevention and Board Care: What Cheap Racks Get Wrong
Cheap racks damage boards because they concentrate weight on hard contact points and let boards rest against each other. A good rack spreads the load across soft, wide padding and holds each board separately.
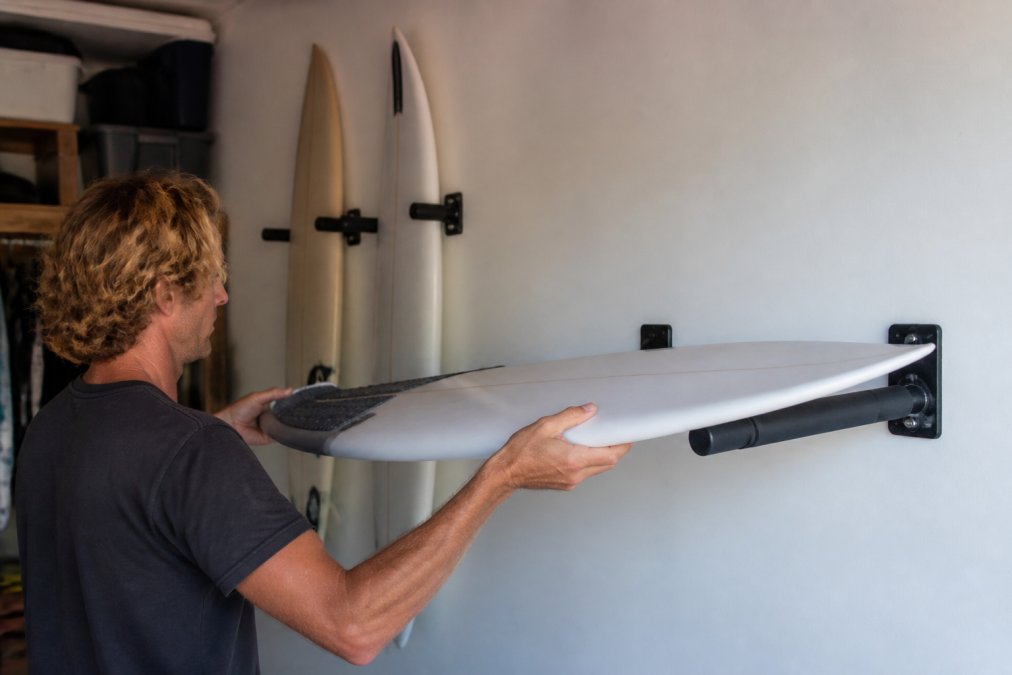
What most cheap racks get wrong:
- Hard contact surfaces. Bare metal or thin foam transfers pressure straight into the board, causing pressure dings over time.
- Boards touching each other. Tight-packed racks let boards knock together every time you load or unload.
- No rail support. Cradles that grip the rail too tightly or narrowly stress the board's edge.
- Metal edges and sharp corners. A durable finish matters, since rust and rough edges scratch decks and rails.
Safety and Load-Bearing: What Your Wall Can Actually Hold
Your wall's capacity depends on whether you hit studs and how the load spreads, not on the rack's marketing claims. A rack rated for heavy loads still fails if anchored into drywall alone.
Step 1: Estimate the Real Weight of Your Quiver
A dry surfboard is lighter than a wet one, and a board that has soaked up water over years is heavier still. Working estimates:
- Shortboard, dry: roughly 5 to 8 pounds
- Funboard or mid-length, dry: roughly 8 to 14 pounds
- Longboard, dry: roughly 12 to 20 pounds
- SUP, dry: roughly 25 to 35 pounds
Step 2: Match the Hardware to the Load
Hardware is rated, and the rating is what matters:
- Lag screws into studs: the strongest common option. A typical 1/4-inch lag screw driven into a wall stud can hold well over 100 pounds in shear, far more than a full quiver needs, which is why stud mounting is the default.
- Drywall anchors: rated individually, with ratings varying widely by type. A common plastic expansion anchor might be rated for 20 to 50 pounds in shear; a heavy-duty toggle bolt or strap toggle can be rated for 50 to 100 pounds or more. Pick anchors rated at least double the weight you expect to hang.
- Molly bolts and hollow-wall anchors: fine for light loads, but they rely on the drywall itself, which crumbles under sustained load and vibration.
Spread the load across two or more mounting points rather than one central fastener, so no single point carries the whole quiver.
Step 3: Know Your Wall Type
Not every wall is drywall over wood studs:
- Drywall over wood studs: the most common residential wall. Stud mounting is straightforward with a stud finder.
- Plaster over lath: older homes. Plaster is brittle and does not hold anchors well; find the studs behind it.
- Brick or concrete block: needs masonry anchors or a hammer drill and sleeve anchors, not drywall hardware.
- Poured concrete: needs concrete anchors or a chemical/epoxy anchor for heavy loads.
If you are unsure what is behind the wall, a professional installer can confirm it. For a rental, a freestanding rack sidesteps the question entirely.
Conclusion
Choosing among the best wall mount surfboard display racks comes down to matching the rack to your space, boards, and wall. Get the contact points and mounting right, and your boards stay protected and easy to reach for years.
Frequently Asked Questions
How do I display a surfboard on a wall without damaging it?
Use a rack with padded contact points, such as high-density foam cradles or neoprene wraps, so the board never rests on hard plastic or metal. Avoid racks that pinch the rails or stack boards against each other, since that causes pressure dings over time. Mount into wall studs rather than drywall alone, and leave a small gap between boards so air circulates and fins do not press into the board next to them. A 360-degree rotating cradle also lets you pull one board without knocking the others.
Should I choose a horizontal or vertical wall mount for my surfboard?
Horizontal mounts suit longboards and wide SUP boards because they spread weight across more of the wall and sit lower for easy grabbing. Vertical mounts save more floor-to-ceiling wall space and work well in narrow garages, hallways, and closets, though they need enough ceiling clearance for the board's full length. If you have a mixed quiver, a vertical rack with adjustable cradles usually fits more boards in the same footprint. Measure your tallest board and your ceiling height before deciding.
How do I safely mount a surfboard rack to drywall?
Find the studs first with a stud finder and drive the included lag bolts into them. If studs do not line up with your rack's mounting holes, use heavy-duty toggle bolts rated for the load, not plastic drywall anchors. Space boards evenly so weight is distributed, and check the rack's weight capacity against your total quiver weight. A single board plus hardware can easily reach 15 to 25 pounds, so plan for the full load, not one board at a time.
What are the benefits of a neoprene-cradled surfboard rack?
Neoprene and foam cradles absorb vibration and spread contact pressure across a wider area than bare hooks or metal arms. That reduces rail pressure and the dings that come from boards shifting against hard surfaces. Neoprene also grips the board so it will not slide when you pull a neighboring board out. Compared to stacking boards in a corner, a padded cradle keeps each board separated, which protects the finish and makes board retrieval faster.